Show Desktop on Windows 11

After bringing back the quick lunch taskbar in Windows 11, after an update my Show Desktop shortcut vanished. I know there is the same functionality in the bottom right corner but after so many years I want it where it was!

So the solution? Right click on Desktop > Create shortcut > (paste) %windir%\explorer.exe shell:::{3080F90D-D7AD-11D9-BD98-0000947B0257} > (type) Show Desktop > Next and done! Right click on the shortcut and change icon!

After that move the shortcut in the quick lunch folder!


How to Enable the Quick Launch Bar in Windows 7 and 11

Windows 11 update!

Before you follow the steps below make sure you download ExplorerPatcher

This will give you the beloved windows 7/8/10 taskbar

Here is what to do to enable the Quick Launch Bar.

  1. Right-click on the Taskbar and select Toolbars > New Toolbar from the menu.
  2. Copy and paste the address provided below into the Address bar ‘%SystemDrive%\Users\%username%\AppData\Roaming\Microsoft\Internet Explorer\‘ then click the arrow to the right of the Address bar to navigate to the folder.
  3. Select the Quick Launch folder listed and click the Select Folder button.
  4. Right click on the toolbar and uncheck “Show Text” and Show Title”
  5. Drag the toobar where ever you want.

Raspberry Pi 4 with Pihole, Pivpn and PADD

Another project during the isolation at home. I got a Raspberry Pi 4 with 2GB RAM. Nice little thing. Not as powerful as other SBCs out there but Raspberries have a huge community to support and myriad of projects. On the plus side it was the quickest to have in my hands.

I used Tiendatec to buy it online. Nice very fast shop. On top of that I got a 3.5 inch TFT screen. The brand is Wavesharethe brand is not important any Raspbian supported screen will work.

So what I wanted to do is to have another Pi-Hole DNS/Ad blocker server and to show statistics in the screen using PADD

How to get started? Grab imager from Raspberry Site or use the good old Etcher and copy Raspbian Lite in a good quality micro SD card. 16Gb Should be enough.

After you finish with the installation and you have done the initial configuration you can install Pihole (https://docs.pi-hole.net/main/basic-install/) after that I installed Unbound DNS server which I strongly recommend.https://docs.pi-hole.net/guides/unbound/

It is quite simple so far. I also installed PiVPN (I prefer watchguard over openvpn) which also was very straight forward. At that point I had a fully capable DNS/Ad Blocking server that is accessible from anywhere through VPN. I have a vpn client on my mobile for ad free browsing.

After that I installed the TFT screen following the instructions here nothing complicated. I had small terminal up and running. Finally I installed PADD following their wiki and although everything should go fine I had trouble with displaying correctly the info. I tested different fonts but with no luck. In the end after reading a post somewhere I edited the PADD script and removed 1-2 “=” characters that fixed the issue. Apparently it was adding a line or two and breaking the display. So all good in the end.

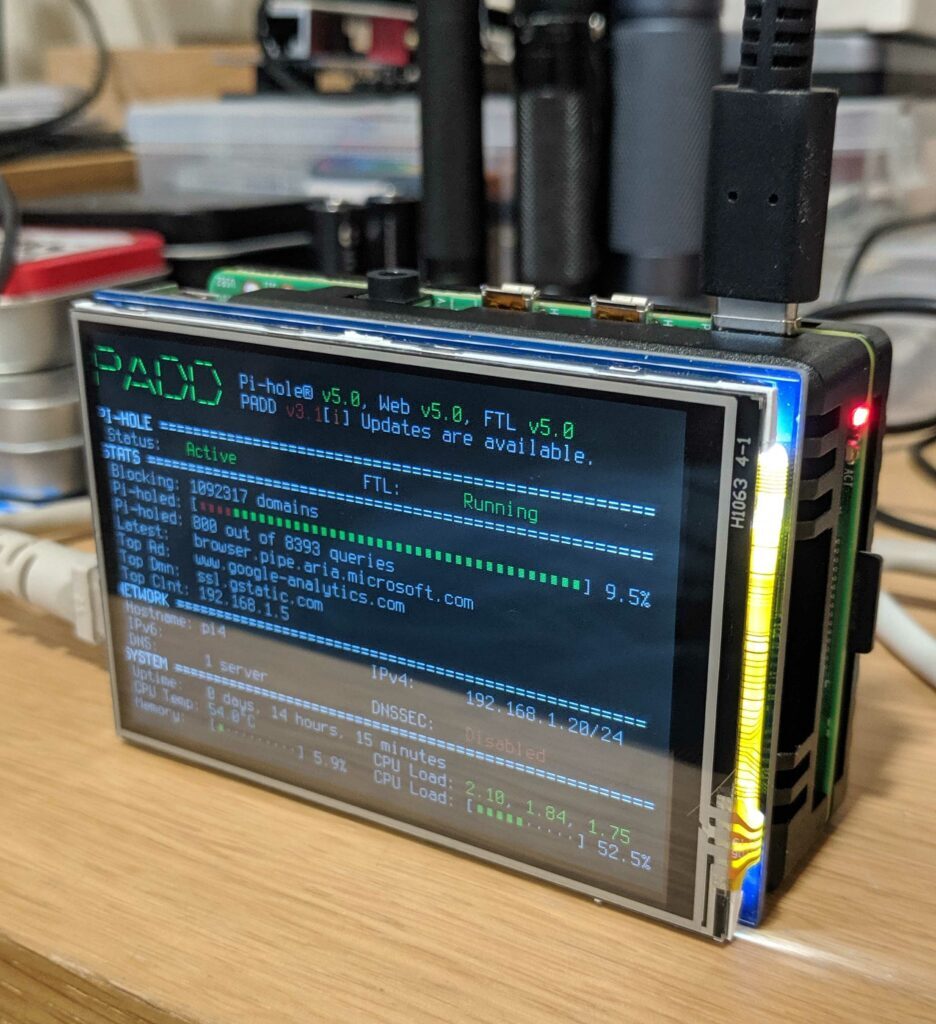
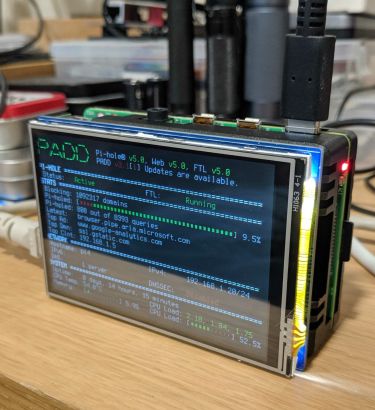
And here it is the final outcome. (Yes I know I need a nice box). Also I have to say that Raspberry Pi 4 gets really hot!


Vintage DIY Internet Radio/MP3 player

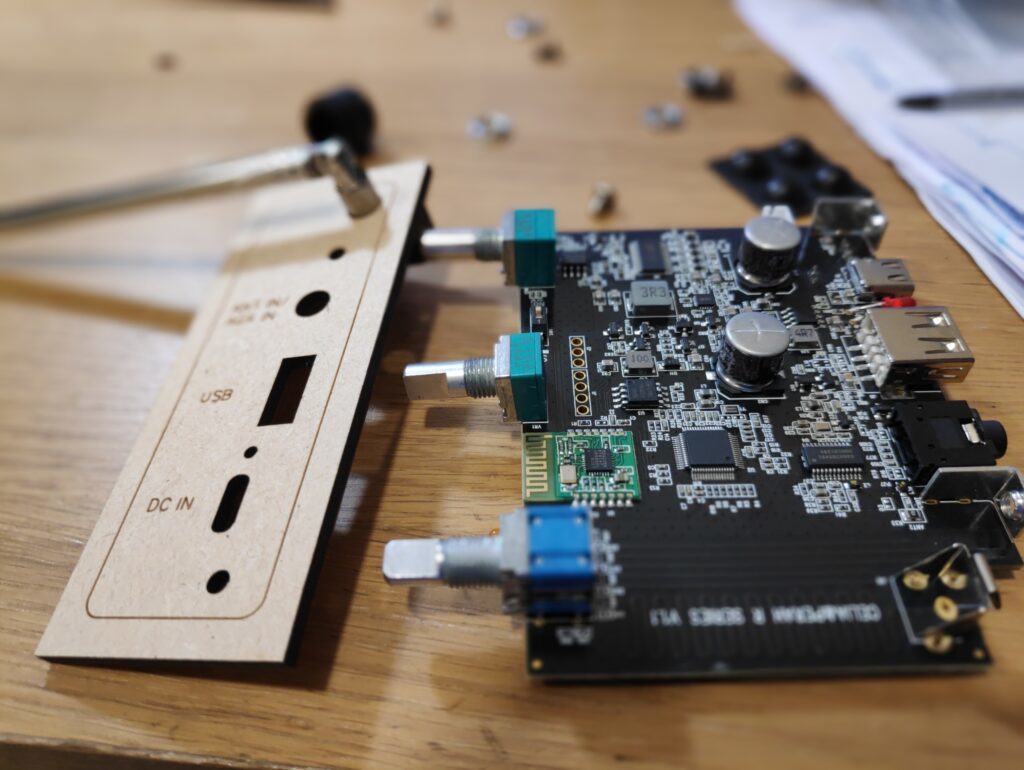
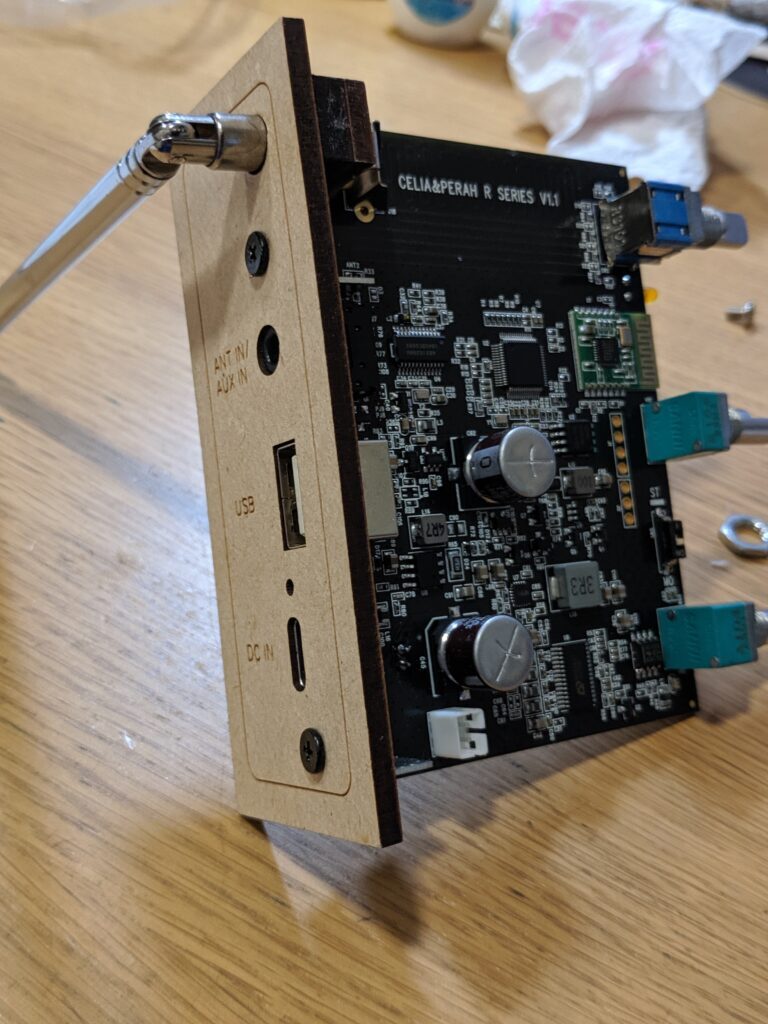
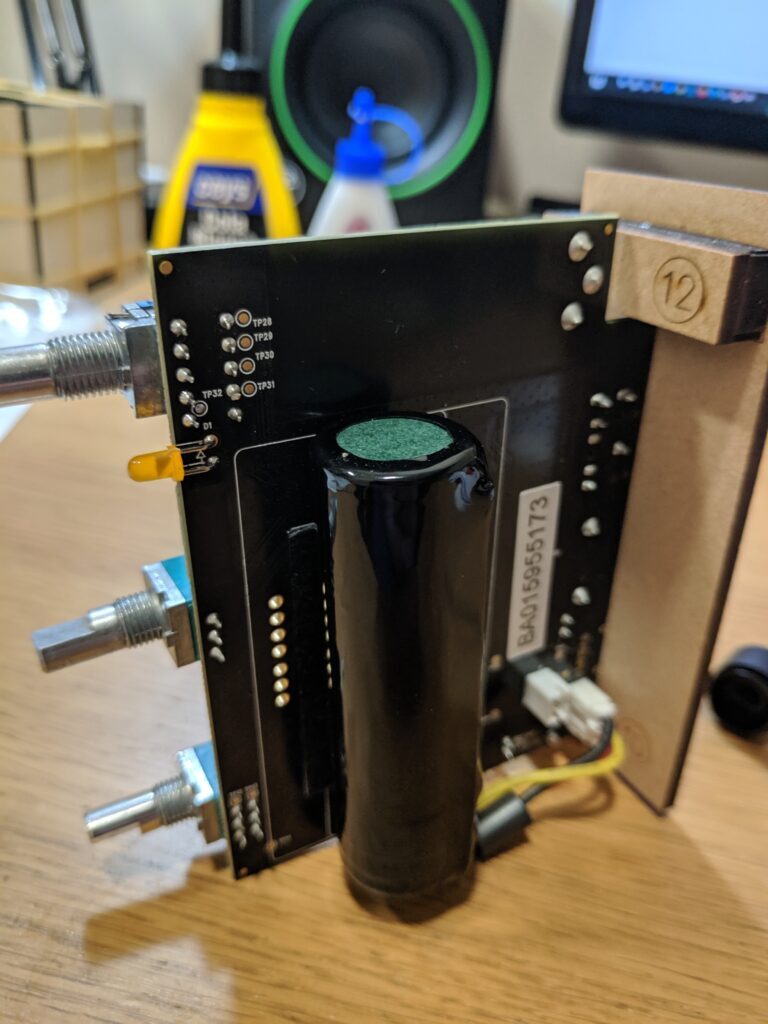
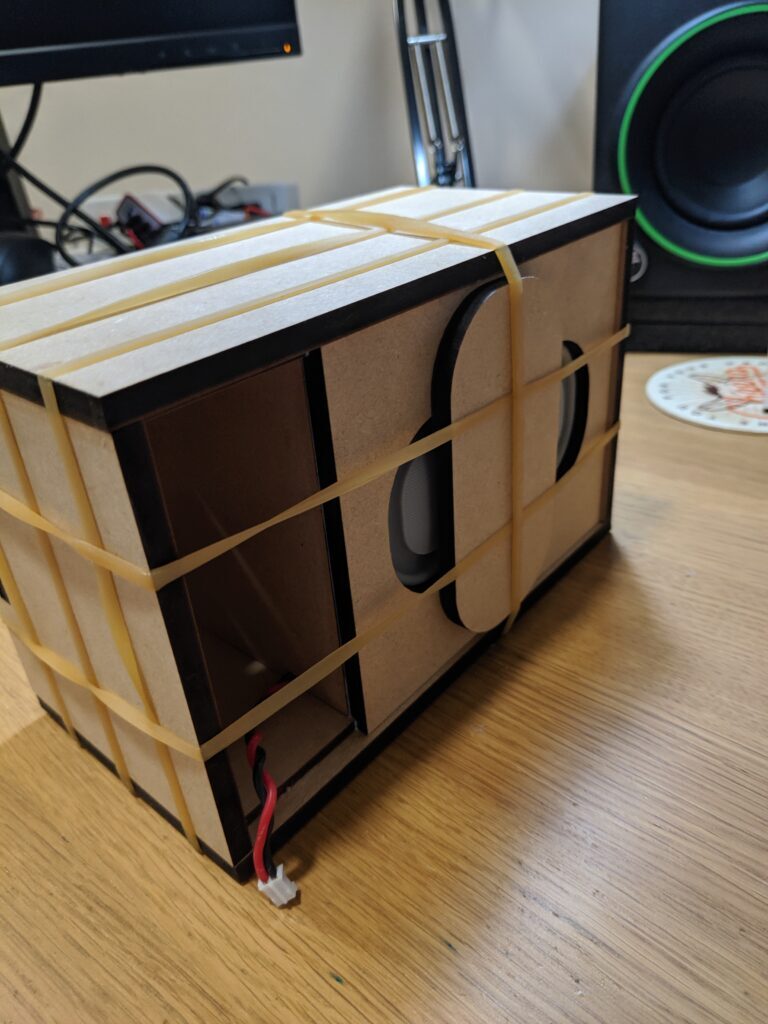
During the lock down  I was looking for a project. I run onto this http://www.celia-perah.com/r-series.html. I liked the design very much. Simple yet elegant.

The best part is that it comes as DIY kit! What more to ask. So ordered one. (The only bad part is that the cost of transportation and taxes was equal to the price of the kit). It came very fast. The quality of the kits and components is very high.

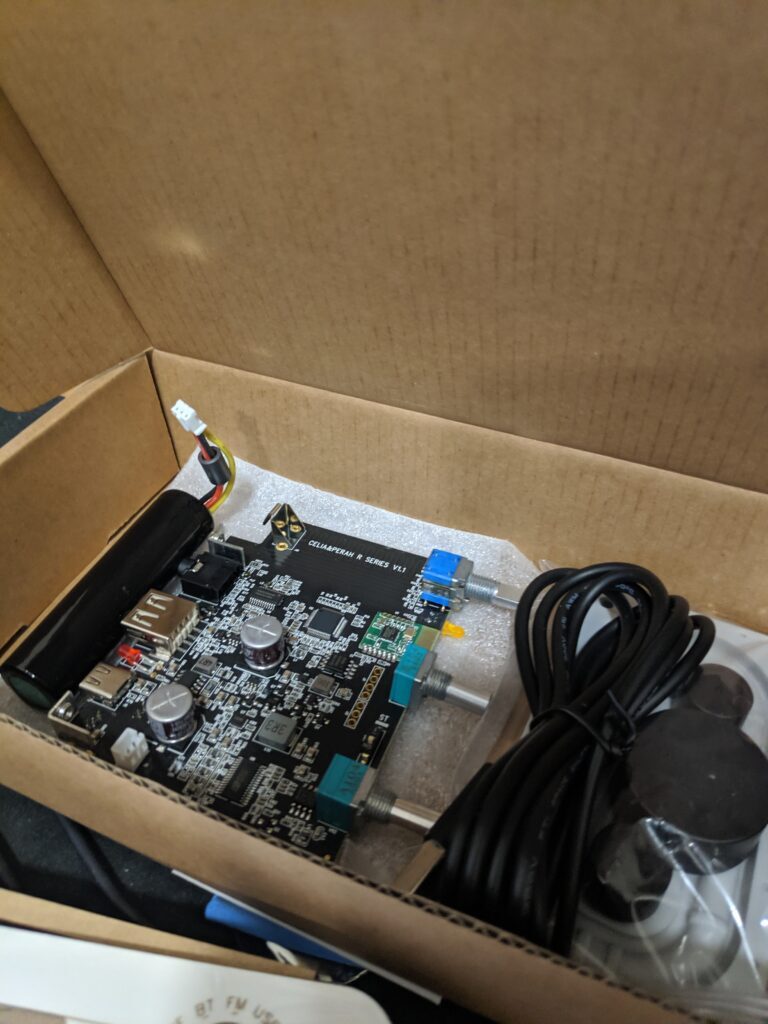
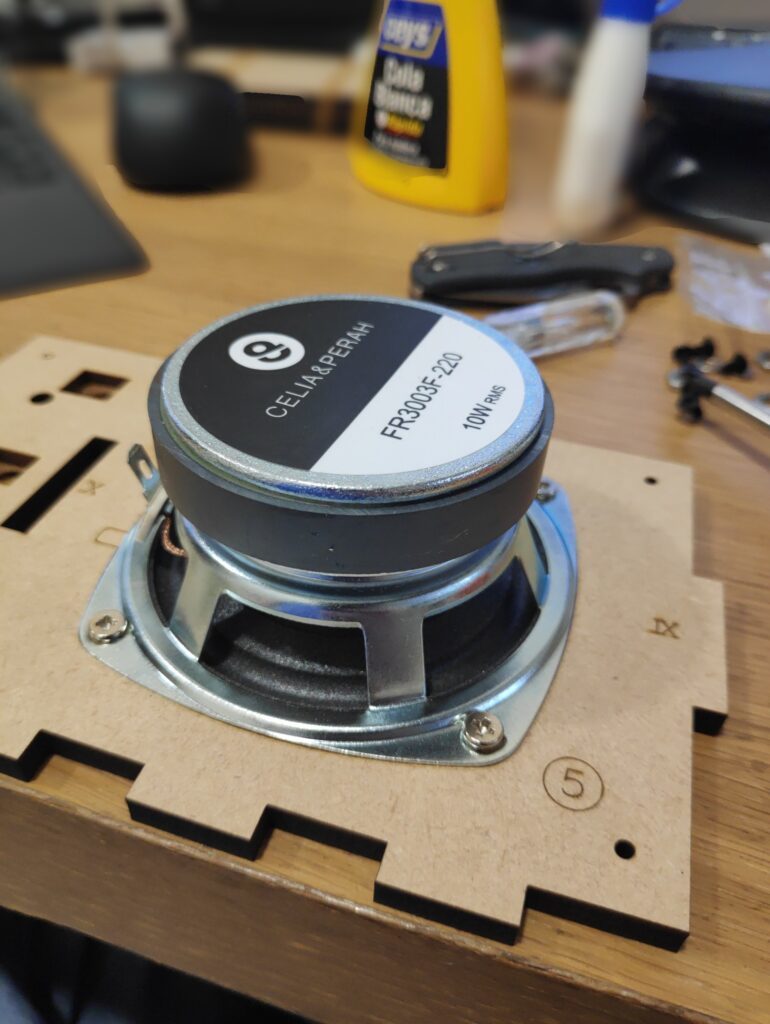
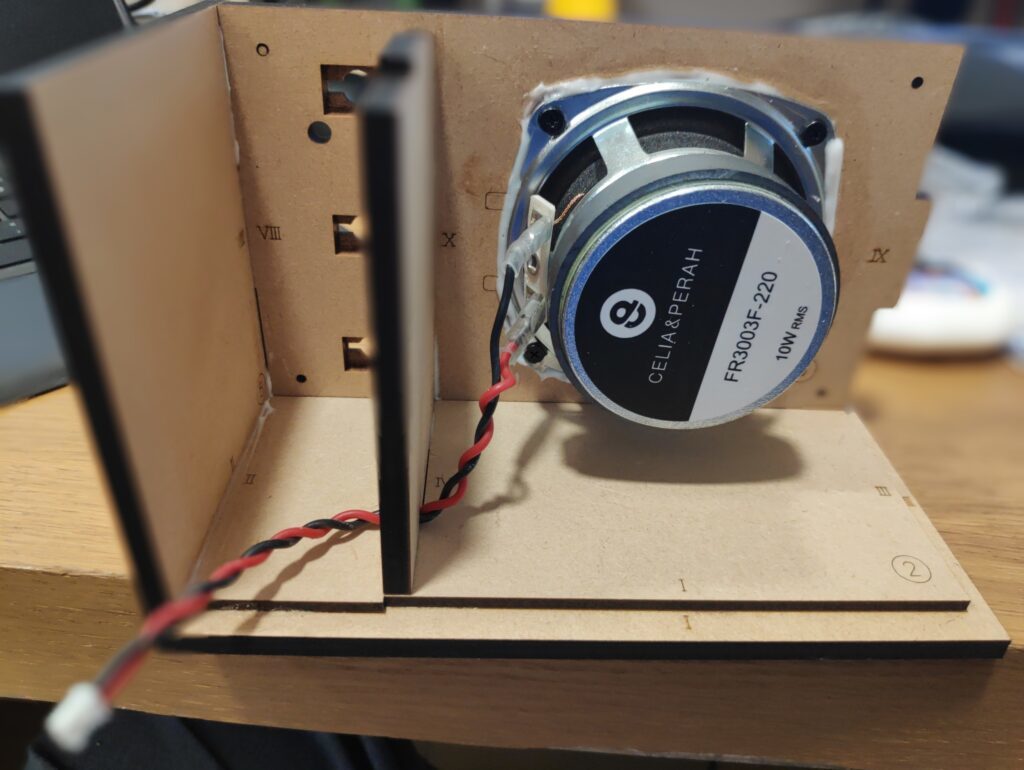
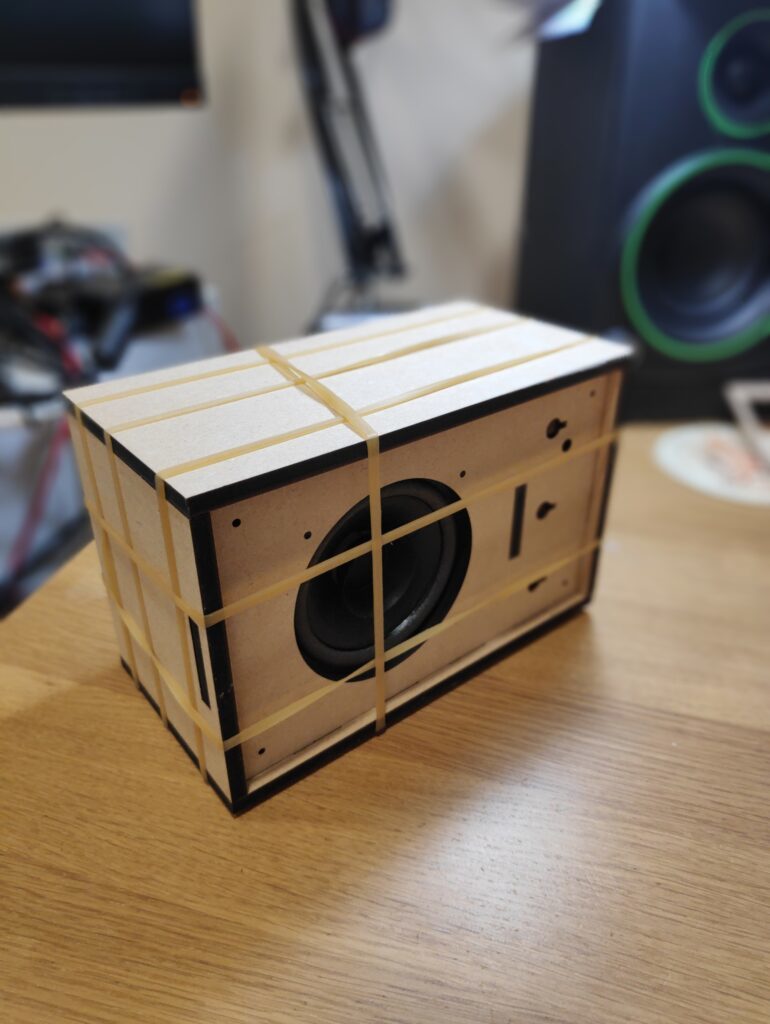
I decided to paint it so it looks more rustic. It took me two afternoons to finish. Mainly waiting for glue and paint to dry. So enjoy my photos.

Nextcloud @ Debian 10

On a clean Debian 10 install type the following

apt-get install apache2 mariadb-server libapache2-mod-php7.2
apt-get install php7.2-gd php7.2-json php7.2-mysql php7.2-curl php7.2-mbstring
apt-get install php7.2-intl php-imagick php7.2-xml php7.2-zip

download the latest versnion from https://nextcloud.com/install/#instructions-server for example:

wget https://download.nextcloud.com/server/releases/nextcloud-17.0.1.tar.bz2

after just decompress the file

tar -xjf nextcloud-17.0.1.tar.bz2

Then copy the installation files to the root of the webserver

cp -r nextcloud /var/www

Please note when you are running the Apache HTTP server you may safely install Nextcloud in your Apache document root!

Give read/write access to web server on the new folder

chown -R www-data:www-data /var/www/nextcloud/

create a configuration file for nextcloud in Apache

pico /etc/apache2/sites-available/nextcloud.conf

with the following content

Alias /nextcloud "/var/www/nextcloud/"

<Directory /var/www/nextcloud/>
  Require all granted
  Options FollowSymlinks MultiViews
  AllowOverride All

 <IfModule mod_dav.c>
  Dav off
 </IfModule>

 SetEnv HOME /var/www/nextcloud
 SetEnv HTTP_HOME /var/www/nextcloud

</Directory>

enable it by issuing

a2ensite nextcloud.conf

enable some needed modules

a2enmod rewrite
a2enmod headers
a2enmod env 
a2enmod dir 
a2enmod mime 

and do not forget to restart Apache

systemctl reload apache2

Now before we go ahead lets prepare MariaDB

systemctl start mariadb
mysql_secure_installation

and after that

mysql
MariaDB> use mysql;
MariaDB> update user set plugin='' where User='root';
MariaDB> flush privileges;
MariaDB> quit

Now you can login to mysql only with the -p option and the password you setup in the previous step. I strongly suggest to setup a user for nextcloud database. Do not use root to create the database.

mysql -u root -p 
CREATE USER 'next'@'localhost' IDENTIFIED BY 'YourPassword';
CREATE DATABASE nextcloud;
GRANT ALL ON press.* TO next@localhost; FLUSH PRIVILEGES; exit;

After that you are pretty much ready to go. Head to the http://IP/nextcloud and follow the steps.

An optional but important step (which I strongly advice to follow is to enable https by default. This will encrypt the communication. To do that we will use Let’sEncrypt.

a2enmod rewrite ssl
nano /etc/apache2/sites-available/default-ssl.conf
 SSLProtocol all -SSLv2 -SSLv3
 Add SSL Cipher in one long line
 SSLCipherSuite          ECDHE-RSA-AES128-GCM-SHA256:ECDHE-ECDSA-AES128-GCM-SHA256:ECDHE-RSA-AES256-GCM-SHA384:ECDHE-ECDSA-AES256-GCM-SHA384:DHE-RSA-AES128-GCM-SHA256:DHE-DSS-AES128-GCM-SHA256:kEDH+AESGCM:ECDHE-RSA-AES128-SHA256:ECDHE-ECDSA-AES128-SHA256:ECDHE-RSA-AES128-SHA:ECDHE-ECDSA-AES128-SHA:ECDHE-RSA-AES256-SHA384:ECDHE-ECDSA-AES256-SHA384:ECDHE-RSA-AES256-SHA:ECDHE-ECDSA-AES256-SHA:DHE-RSA-AES128-SHA256:DHE-RSA-AES128-SHA:DHE-DSS-AES128-SHA256:DHE-RSA-AES256-SHA256:DHE-DSS-AES256-SHA:DHE-RSA-AES256-SHA:AES128-GCM-SHA256:AES256-GCM-SHA384:AES128-SHA256:AES256-SHA256:AES128-SHA:AES256-SHA:AES:CAMELLIA:DES-CBC3-SHA:!aNULL:!eNULL:!EXPORT:!DES:!RC4:!MD5:!PSK:!aECDH:!EDH-DSS-DES-CBC3-SHA:!EDH-RSA-DES-CBC3-SHA:!KRB5-DES-CBC3-SHA
 SSLHonorCipherOrder     on
 SSLOptions +StrictRequire
 Header always set Strict-Transport-Security "max-age=63072000; includeSubdomains"
 Header always set X-Frame-Options DENY
 Header always set X-Content-Type-Options nosniff

This will enable ssl on Apache and then you have to add the ciphers to support along with some more security enhancements

Install the certbot. It will do most of the job for you.

apt-get -y install certbot
apt-get -y install python-certbot-apache
certbot --authenticator webroot --installer apache

 crontab -e
 0 2 * * * certbot renew >> /var/log/letsencrypt.log

That’s it! You are done.
 

Blockchain as answer to democracy.

Blockchain as an answer to luck of direct democracy.
Voting or e-voting is struggling because of trust or the luck of it. Blockchain could solve this since it is all about trust and transparency.
Giving a tool to people able to directly affecting the decisions is the epitome of democracy. Direct democracy. Scary and exciting at the same time.
Is it possible? It is.
Is it worthy? Definitely if you believe in democracy.
We have all the ingredients to achieve direct democracy through blockchain we need to put the together.
Who is against? All who do not want transparency, who do not want people to have such a power and all buerocratic state of minds

Web server on OrangePi Zero running Armbian

Part I

The hardware

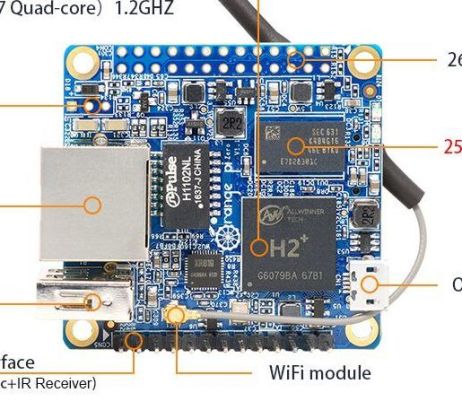
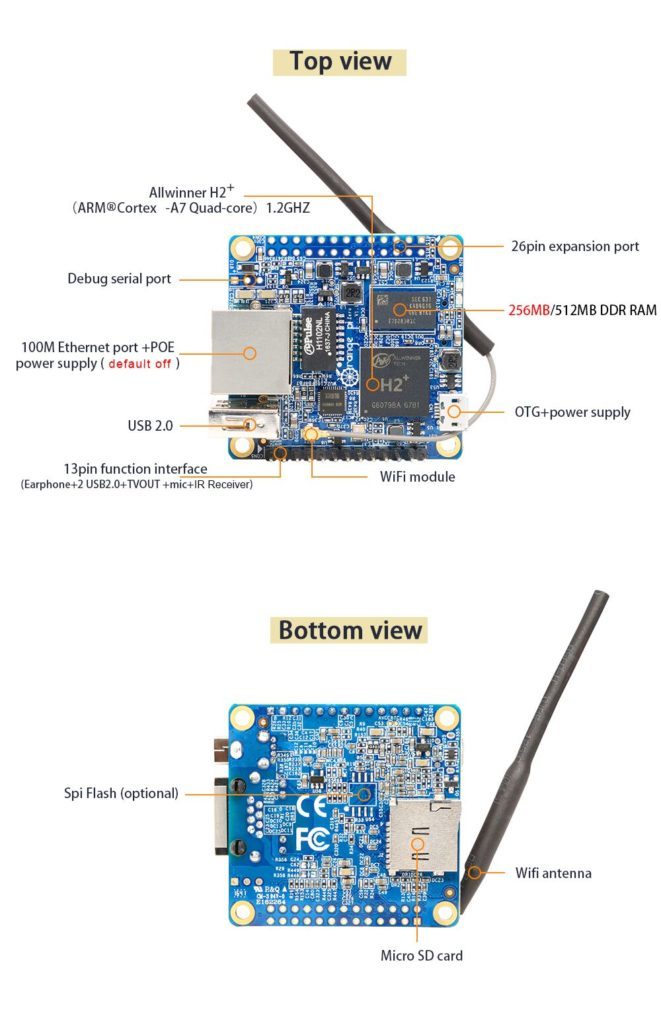
So I have a new side project. To build a web server to run WordPress on it. What’s the excitement on that you may ask. Well I wanted to build a server with the lowest consumption possible, tiny footprint (both physical and from OS point of view). I started searching for a small developer board. I already own a RaspberryPI but I wanted something else. There are numerous of boards out there. Do not get me wrong RaspberryPI is the pioneer and they opened the road but I wanted something else and why not cheaper. I stumbled upon OrangePi. A lot of boards there. I chose OrangePi Zero board. A tiny little thing that is an open-source single-board computer. It can run Android 4.4, Ubuntu, Debian. It uses the AllWinner H2 SoC, and has 512MB DDR3 SDRAM. It is only 48 mm × 46mm. It is impressive that this little thing has more power and more memory than my first web server in the ’90s ( a Pentium MMX 166 if I remember correctly, with 256 MB RAM). The company provides a very good support through their website. There are a lot of resources there and a good community. So I got the board from AliExpress for around 8$. Not bad at all. The OrangePi Zero so far ticks most of my boxes. Cheap, small, low power consumption and open source. Functionalities can be added by extension board. I bought the NAS extension board which adds an mSATA and a SATA connection among other things. The goal is to boot and run the system from an mSATA disk. Next stop what to run on it.

The OS

OrangePI offers a lot of distributions to choose from and download.Each of them are customised to the board. This includes Android, Ubuntu, Debian, Raspbian and others. I tried couple of them but since I heard of Armbian project I wanted to try it. Armbian is “Lightweight Debian Jessie or Ubuntu Xenial based Linux distribution”. The project supports a lot of boards not only OrangePI obviously. There are detailed instructions to burn the image on an SD. It is pretty straight forward. It took maybe thirty minutes to install to SD, boot up and config my OrangePI. Its name is portokali which means orange in Greek. You can check some statistics here.

Part II

Fine Tune

Coming soon

Installing the WordPress

 Coming soon

Transfer WhatsApp (and other data) from iPhone to Android

After a long time with Apple iPhone and because the last update of IOS 11 made my iPhone 5s really sluggish I decided to abandon Apple’s ecosystem once more and try Android again.

So I got a nice new Xiaomi Redmi 4X with 4GB RAM and 64GB ROM! Nice, cheap and fast.

The issue is that moving from one platform to another is not as straightforward as it sounds. Especially for apps which are not entirely cloud based.

One of the most important apps that I use daily (and a lot of people do also) is Whatsapp! If you do not know it you leave in another planet!

WhatsApp has a built in feature to back up locally or cloud (icloud or google drive respectively) BUT the backup cannot be transferred from one platform to another!

If you Google the solution there a lot of guides they claim you can do it. Most of them are just promoting software. Quite expensive for the task in my opinion.

So what is the solution? You need one application to your PC/MAC and one app on your Android. The first is free and it is called iPhone Backup Viewer (it is free when your iPhone backup is not encrypted).

The second is an app you can find in Play store. It is called WazzapMigrator and I think it worth its cost. The only issue I found it is the instructions. They are all over the place and do not follow the logical flow but it is all there!

So what are the steps?

  1. Backup you iPhone with iTunes on you PC or MAC. DO NOT encrypt the backup! (*)
  2. Download and run iPhone Backup Viewer. It will find your backup automatically.
  3. Follow those instructions to find your WhatsApp messages and media files and store them on your PC/MAC.
  4. Go to your Android install WazzapMigrator and run it once. Install WhatsApp but do NOT run it yet.
  5. Connect your Android to your PC/MAC. Go to internal storage of your device. You should see a WazzapMigrator folder. IF not then restart your Android device. You will be able to see it.
  6. Copy the messages (ChatStorage.sqlite) and media to WazzapMigrator folder. Run WazzapMigrator. It should find messages and media and convert them. Allow it to move it to WhatsApp folder.
  7. Run WhatsApp. It should find the backup and restore it.
  8. That’s it!

It took me more time to find the solution than actually transfer the files and do the migration.


(*) I suppose you already know how to move the rest of the data from your iPhone to Android.

Do not forget before you wipe your iPhone to deregister from imessages/facetime and unpair with your Apple Watch.

The Cult of Done Manifesto

  • There are three states of being. Not knowing, action and completion.
  • Accept that everything is a draft. It helps to get it done.
  • There is no editing stage.
  • Pretending you know what you’re doing is almost the same as knowing what you are doing, so just accept that you know what you’re doing even if you don’t and do it.
  • Banish procrastination. If you wait more than a week to get an idea done, abandon it.
  • The point of being done is not to finish but to get other things done.
  • Once you’re done you can throw it away.
  • Laugh at perfection. It’s boring and keeps you from being done.
  • People without dirty hands are wrong. Doing something makes you right.
  • Failure counts as done. So do mistakes.
  • Destruction is a variant of done.
  • If you have an idea and publish it on the internet, that counts as a ghost of done.
  • Done is the engine of more.

Source